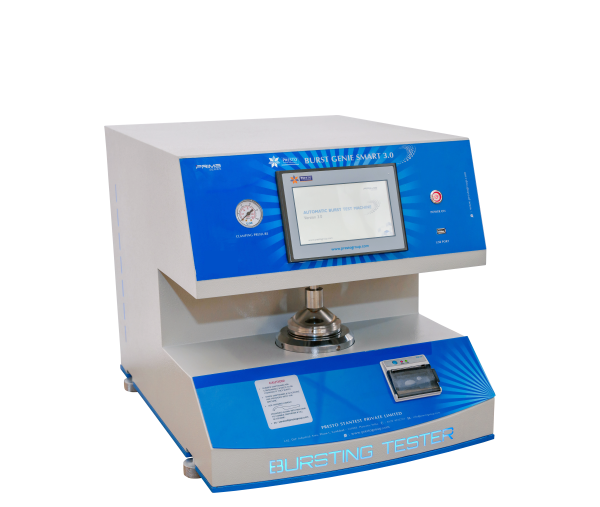
Bursting Strength Tester – Genie Smart 3.0
4.67 out of 5
Availability: In Stock
Shipping location: All over the world
Brand: Testing Instruments
Presto Bu..read more
If you want to operate this testing machine successfully, then you need to start the machine by plugging it into a 3 Pin - 5 Amp power supply socket. After that, turn the mains Switch on. There are two different test gauges provided with the instrument with two different test ranges. If you want to test the specimen having a bursting value between 0 and 7 kgf/cm2, then you should loosen the valve of Gauge. If the specimen has an estimated bursting value higher than 7 kgf/cm2, then you should loosen the operating valve of Gauge II. Make sure that only one valve is opened at the time of test and the other valve is closed properly. Giving three rotations in the anticlockwise direction would be enough to make the gauge operational. Rotating the operating valve more than that may cause spillage of the test fluid. If the dummy needle of the gauge indicates some readings due to previous tests. Please rest it to zero by turning the knob in an anticlockwise direction. Once the gauge is selected and the dummy needle is set to zero you can place the test Specimen. In order to place the testing specimen accurately, you need to Take a Test specimen of Minimum Dimensions 100 mm X 100 mm. Take the upper clamp upwards by rotating the operating wheel in the anti-clockwise direction. Place the specimen so that it completely covers the Lower clamp. Now rotate the operating wheel in a clockwise direction to bring the upper clamp down on the test specimen. Tighten the wheel to make sure that the test specimen is firmly held and there are no chances of slippage. Once you place the specimen accurately in this testing machine, then you can easily commence the test. If you find any issue regarding its working, then give us a call. We will assist you in a more efficient way.
Features of Bursting Strength Tester – Genie Smart 3.0
- Microprocessor-based high-speed controller for accurate test results
- Highly accurate results
- The equipment is programmed with individual test templates for measurement with three ranges
- The equipment is designed to provide easy access by automatically calculating the Bursting Factor
- Can test with maximum, minimum, and average results for ten samples.
- When a test is complete, the dynamic fixtures automatically move to the home location.
- Fastest Human Machine Interface (HMI) powered by Cortex-A8 high-speed processor
- HMI can also be connected to your computer for access.
- USB option available (Pen drive is not a part of supply)
- 3 point Testing Rang (Low / Medium / High) feature selection
- Current test running status display
- Pneumatically operated Sample Clamp
- Can generate and download the soft copy of the report in a go in pdf format
- CSV format and you can add as much customize the information
- Equipment is added with security layers to allow access only to registered user
- Use USB interface and PC communication, synchronous test function can connect to the computer.
Technical specifications
- Capacity: 40 kg/cm²
- Display: Latest Color TFT Touch Screen
- Accuracy: ± 1% within 10% to 90% of the entire range as per IS: 1828 with the master gauge
- Least Count/Resolution: 0.1Kg/cm2
- Power: 220V, Single phase, 50 Hz
- Test fluid: Glycerin about 98% purified (lab grade)
- Rate of fluid displacement: 95 cc/minute
- Motor: 1/4 HP Single Phase, 1440 rpm
- Test Range: 0.5Kg / cm2 to 38 Kg / cm2
- Memory(to hold test value): Up to 9 test values
- Peak Hold Facility: Yes
- Safety Switch: Yes
- Material: Mild Steel
- Finish: Powder-coated Havel Gray & Blue combination finish and bright chrome/zinc plating for a corrosion-resistant finish
- The report can generate: Yes (Sample Results and Bar Graph)
- Thermal Printer: Yes
Related Products
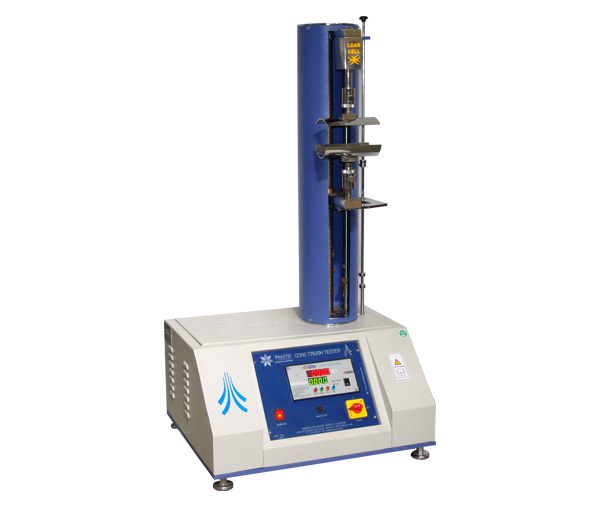
Cone Crush Tester - Digital

Crush /RCT/ECT /FCT- Digital cum Computerized Model
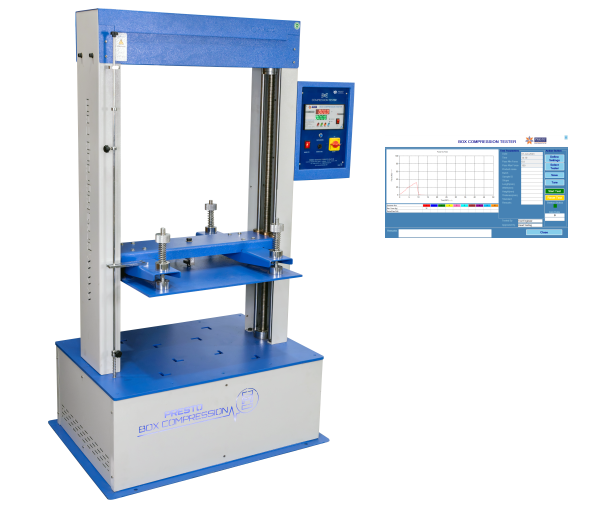
Box Compression Tester - Digital Cum Computerised

Drop Tester Motorized Pneumatic

For More details & Information
Please fill this form
Bursting Strength Tester – Genie Smart 3.0
4.67 out of 5
Availability: In Stock
Shipping location: All over the world
Brand: Testing Instruments
Presto Bursting strength tester Genie Smart 3.0 model is designed for reliable measurement of bursting strength of corrugated boxes. With the help of this model, you will be able to test the strength of the material under certain multi-directional force and is defined as the hydrostatic pressure that is required to produce rupture of the material when pressure is applied to it at an increased rate through a rubber diaphragm. The Bursting Strength Tester is designed to find the bursting strength of Paper/Paperboard. A Test specimen is held between two annular clamps under sufficient pressure to minimize slippage. The Upper Clamping surface has a continuous spiral groove, and the Lower Clamping surface has a number of concentric grooves. A Circular Diaphragm of pure gum rubber is clamped between the lower clamping plate and a pressure cylinder so that before the diaphragm is stretched by pressure underneath it, the center of its upper surface is below the plane of the clamping surface.
In the analogue model, you will get two analogue pressure gauges with ranges 0-7 kgf and 35 kgf and having a least count of 200 g/cm2 and 1 kgf/cm2 respectively. This testing instrument is ideal for testing the bursting strength of various materials like solid fiberboards, industrial fabrics, leather, uneven boards and boxes, industrial fabric and solid fiberboards, filter cloth, plastic films, Foils, sheets, etc. PRESTO Bursting Strength Tester is manufactured under various test standards like ASTM D 3786-01, ASTM D 3786 – 80A, ISO 1060 PART-1 1987.
When you apply hydraulic pressure through a rubber diaphragm on the test specimen then it will relatively rupture the material. You can easily calculate the value of hydraulic pressure that will rupture the testing specimen in terms of kg/cm2. Corrugated boxes are used in many industries, from retail packaging to foodservice. You'll want to make sure that your boxes have enough strength so they don't burst when filled with heavy items. The best way to do this is by understanding what makes up a strongbox and then testing it against these criteria before putting it into use. Thus, with the help of the Presto Bursting Strength Tester Analogue Model, you will be able to determine the maximum amount of force a package can take before it bursts.
It doesn't matter how careful you are with your product packaging if it isn't strong enough because any mishandling will cause damage. After testing has been done, manufacturers use these results to make sure their products are safe and secure when they reach consumers. Therefore, with the help of the Presto Bursting Strength Tester Analogue model, you will be able to get accurate testing results of bursting forces that rupture the specimen. The need to test the bursting strength of corrugated boxes is necessary because it can be a crucial factor in how your product is received by consumers. If your package doesn't have the appropriate burst strength, then it cannot withstand the forces to test the bursting strength of boxes.
If you want to operate this testing machine successfully, then you need to start the machine by plugging it into a 3 Pin - 5 Amp power supply socket. After that, turn the mains Switch on. There are two different test gauges provided with the instrument with two different test ranges. If you want to test the specimen having a bursting value between 0 and 7 kgf/cm2, then you should loosen the valve of Gauge. If the specimen has an estimated bursting value higher than 7 kgf/cm2, then you should loosen the operating valve of Gauge II. Make sure that only one valve is opened at the time of test and the other valve is closed properly. Giving three rotations in the anticlockwise direction would be enough to make the gauge operational. Rotating the operating valve more than that may cause spillage of the test fluid. If the dummy needle of the gauge indicates some readings due to previous tests. Please rest it to zero by turning the knob in an anticlockwise direction. Once the gauge is selected and the dummy needle is set to zero you can place the test Specimen. In order to place the testing specimen accurately, you need to Take a Test specimen of Minimum Dimensions 100 mm X 100 mm. Take the upper clamp upwards by rotating the operating wheel in the anti-clockwise direction. Place the specimen so that it completely covers the Lower clamp. Now rotate the operating wheel in a clockwise direction to bring the upper clamp down on the test specimen. Tighten the wheel to make sure that the test specimen is firmly held and there are no chances of slippage. Once you place the specimen accurately in this testing machine, then you can easily commence the test. If you find any issue regarding its working, then give us a call. We will assist you in a more efficient way.
Features of Bursting Strength Tester – Genie Smart 3.0
- Microprocessor-based high-speed controller for accurate test results
- Highly accurate results
- The equipment is programmed with individual test templates for measurement with three ranges
- The equipment is designed to provide easy access by automatically calculating the Bursting Factor
- Can test with maximum, minimum, and average results for ten samples.
- When a test is complete, the dynamic fixtures automatically move to the home location.
- Fastest Human Machine Interface (HMI) powered by Cortex-A8 high-speed processor
- HMI can also be connected to your computer for access.
- USB option available (Pen drive is not a part of supply)
- 3 point Testing Rang (Low / Medium / High) feature selection
- Current test running status display
- Pneumatically operated Sample Clamp
- Can generate and download the soft copy of the report in a go in pdf format
- CSV format and you can add as much customize the information
- Equipment is added with security layers to allow access only to registered user
- Use USB interface and PC communication, synchronous test function can connect to the computer.
Technical specifications
- Capacity: 40 kg/cm²
- Display: Latest Color TFT Touch Screen
- Accuracy: ± 1% within 10% to 90% of the entire range as per IS: 1828 with the master gauge
- Least Count/Resolution: 0.1Kg/cm2
- Power: 220V, Single phase, 50 Hz
- Test fluid: Glycerin about 98% purified (lab grade)
- Rate of fluid displacement: 95 cc/minute
- Motor: 1/4 HP Single Phase, 1440 rpm
- Test Range: 0.5Kg / cm2 to 38 Kg / cm2
- Memory(to hold test value): Up to 9 test values
- Peak Hold Facility: Yes
- Safety Switch: Yes
- Material: Mild Steel
- Finish: Powder-coated Havel Gray & Blue combination finish and bright chrome/zinc plating for a corrosion-resistant finish
- The report can generate: Yes (Sample Results and Bar Graph)
- Thermal Printer: Yes


