
Digital Profile Projector with DRO
4.9 out of 5


If you are looking to have a perfect testing instrument to measure the micro parts, digital linear and to take the angular measurements of various Preforms, then we suggest you go with Digital Profile Projector with DRO. We at Presto have come up with this amazing testi..read more
If you wish to get an accurate testing result from this testing instrument, then you need to do the following procedure to get the result. Find the radius and center of the circle. For this, you have to give any three points on the circle. Let PQ will be the base of the circle, RQ will be the perpendicular and RP will be the Hypotenuse. Follow these steps to get assured results.
- Press the circle key to start to find the radius and circle.
- Now LED on the circle key will turn ON.
- Also LED on INCH/MM key will start blinking which indicated that you have to give the first point p of the circle.
- Move the slide towards point P and press the circle key.
- Now LED on INCH/MM key will turn off.
- Also LED on INC/ABS key will start blinking which indicates that you have to give the second point q of the circle.
- Move the slide towards point Q and press the circle key.
- Now LED on INC/ABS key will turn off.
- Also LED on DMS/DEG key will start blinking which indicates that you have to give the third point r of circle.
- Move the slide towards point r and press the circle key.
- Now led on inch/mm, inc/abs, DMS/deg key will start blinking which indicates that all points have been given.
- Centre of the circle is shown on the x-axis and axis window.
- Press any key to see the radius of the circle.
- The Y-axis window will show the value of radius.
When you follow all these steps completely, then you need to take care that if the radius is greater than 300 mm or if the points given are on a single line then an error message will be shown. Thus, you should mark these points 180 degrees more than apart from each other. This will give you better results.
Features of Digital Profile Projector with DRO
This testing instrument from Presto consists of various features that we have listed below:
- Compact lightweight Table Top model with easy operations.
- 300mm diameter screen with 90° cross line and chart holders.
- The screen is graduated to 360° with Vernier reading 1 minute.
- Projection Light Source with 24V /150W Halogen Lamp.
- Double Oblique Light Source for Surface Illumination.
- Two adjustable dichromic reflector lamps 12V/100W each.
- Focusing can be adjusted manually by handwheel.
- High-Quality objective lenses.
- Optical distortion below 0.15%. Standard magnifications: 10x
Technical specifications
- Table type & size: AL 300 x 200 mm
- Effective table area: 275 x 180 mm
- X-Y range: 200 x 100 mm
- Measuring unit: Built-in linear scales
- Resolution: 0.001 mm
- Screen Size: 300 mm
- View Field Diameter: 30 mm
- Working distance: 65 mm
Related Products

Hot air oven prima series

Xenon Test Chamber PSPL 866

Vibration Table
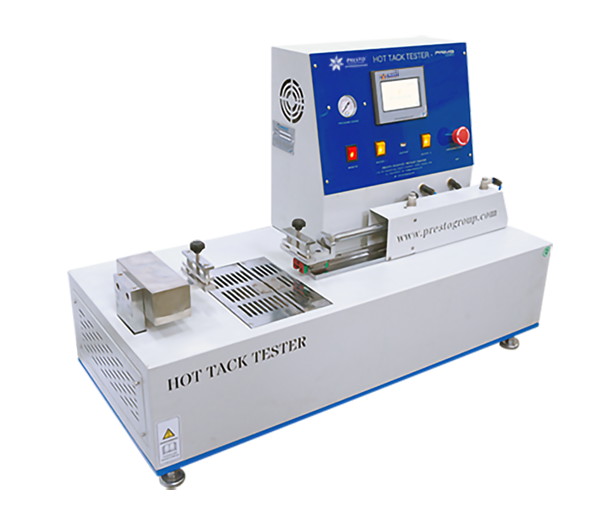
Hot Tack Tester - Prima Series
For More details & Information
Please fill this form


Digital Profile Projector with DRO
4.9 out of 5
If you are looking to have a perfect testing instrument to measure the micro parts, digital linear and to take the angular measurements of various Preforms, then we suggest you go with Digital Profile Projector with DRO. We at Presto have come up with this amazing testing equipment to check the quality of the Preforms at the time of production. This testing equipment has been provided with an in-built grid that can be rotated 360 degrees to align the axis along with the straight edge of machined parts to observe them clearly. This compact and lightweight tabletop model will perform easy test operations. This testing instrument has a screen that is graduated to 360° with Vernier reading 1 minute.
It has a projection light source with a 24V / 150W Halogen Lamp. The double oblique light source for surface illumination has also been embedded in this testing instrument. It has two adjustable dichromic reflector lamps 12V/100W each. The Profile Projector is packed in two parts to ensure maximum safety during transit. The first part is the main body and the other part is the stage which is packed separately. To install this testing instrument accurately, you need to open the two packets and, remove all the packing material along with cotton straps. Clean all external surfaces gently like an objective lens, glass screen & glass stage with soft tissue. The handle of this testing machine that is removed in the transportation process, can be fitted by tightening the Allen screw on the flat portion of the axle. The PMD series of this testing instrument is a result of extensive research and development carried out at our innovative labs. The counter mainly consists of two or three-channel quadrature, TTL 5v, Phase Shift signal inputs used to connect linear or rotary encoders. Channel x and y are mainly used for the measurement of linear displacements ranging from +/- to +/-999.999mm. Channel c is used for the measurement of angular displacement.
If you are setting the DRO for the first time, then you need to press and hold the “inch/mm” key and simultaneously turn the DRO power on. DRO display window shall be blank. After keeping it pressed for about 3 to 4 sec after power on release the key. now the DRO is set to default factory set modes viz: counting is set to mm, DMS ( degree minutes and seconds ), resolution set to 0.005mm abs, and second window set to display t axis ( in case of 2 axis model rotary i.e. q axis is disabled ). Counts for all axes are set to absolute zero. In this way, you can easily set the DRO before performing the test.
If you wish to get an accurate testing result from this testing instrument, then you need to do the following procedure to get the result. Find the radius and center of the circle. For this, you have to give any three points on the circle. Let PQ will be the base of the circle, RQ will be the perpendicular and RP will be the Hypotenuse. Follow these steps to get assured results.
- Press the circle key to start to find the radius and circle.
- Now LED on the circle key will turn ON.
- Also LED on INCH/MM key will start blinking which indicated that you have to give the first point p of the circle.
- Move the slide towards point P and press the circle key.
- Now LED on INCH/MM key will turn off.
- Also LED on INC/ABS key will start blinking which indicates that you have to give the second point q of the circle.
- Move the slide towards point Q and press the circle key.
- Now LED on INC/ABS key will turn off.
- Also LED on DMS/DEG key will start blinking which indicates that you have to give the third point r of circle.
- Move the slide towards point r and press the circle key.
- Now led on inch/mm, inc/abs, DMS/deg key will start blinking which indicates that all points have been given.
- Centre of the circle is shown on the x-axis and axis window.
- Press any key to see the radius of the circle.
- The Y-axis window will show the value of radius.
When you follow all these steps completely, then you need to take care that if the radius is greater than 300 mm or if the points given are on a single line then an error message will be shown. Thus, you should mark these points 180 degrees more than apart from each other. This will give you better results.
Features of Digital Profile Projector with DRO
This testing instrument from Presto consists of various features that we have listed below:
- Compact lightweight Table Top model with easy operations.
- 300mm diameter screen with 90° cross line and chart holders.
- The screen is graduated to 360° with Vernier reading 1 minute.
- Projection Light Source with 24V /150W Halogen Lamp.
- Double Oblique Light Source for Surface Illumination.
- Two adjustable dichromic reflector lamps 12V/100W each.
- Focusing can be adjusted manually by handwheel.
- High-Quality objective lenses.
- Optical distortion below 0.15%. Standard magnifications: 10x
Technical specifications
- Table type & size: AL 300 x 200 mm
- Effective table area: 275 x 180 mm
- X-Y range: 200 x 100 mm
- Measuring unit: Built-in linear scales
- Resolution: 0.001 mm
- Screen Size: 300 mm
- View Field Diameter: 30 mm
- Working distance: 65 mm